How To Create PowerPoint Images For Online Post | Plus Sites That Offers Free Images

This hub was inspired by a question that has been asked so many time by so many hubbers, and that is, "Where/How do I get Images for My Hubs?" or as in a recent question "Where do you find pictures for hubs?". Many new hubbers want to know, as did some of us who have been on hubpages before them.
Online Images Plagiarism
A while ago, hubpages sent out a memo warning hubbers about the use of images taken online, mostly Google images. These images tends to belong to someone, and the use of them without going through the proper channel of requesting permission to use these images could result in dire legal consequences.
While many have suggested so many sites, such as, stock.com, flicker.com, and morguefile.com for free images, some of the images here may also have their limitations as far as their use, and for what purpose. So, proceed with caution, as you never knows when the use of an image can land you in trouble.
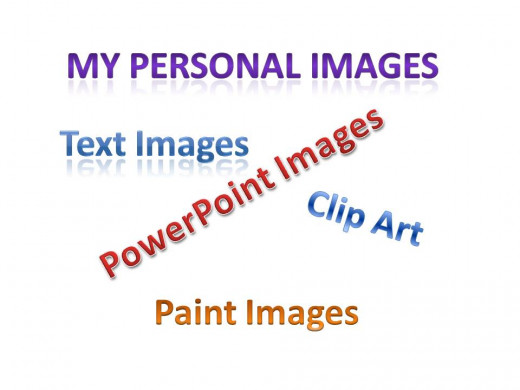
Create Your Very Own Unique Images Using MS PowerPoint
So, here I decided to give a step by step tutorial on how I've used Microsoft PowerPoint to create unique images for use in my hubs.
♦♦♦♦♦♦♦♦♦♦♦♦♦♦♦♦♦♦♦♦♦♦♦♦♦♦♦♦♦♦♦♦♦♦♦♦♦♦♦♦♦♦♦♦♦♦♦♦♦♦♦♦♦♦♦♦♦♦♦♦♦♦♦♦♦♦♦♦♦♦♦♦♦
Hub's Table of Content

Creating A Text Image Using MS PowerPoint
This tutorial is going to show you how to create simple text images using MS PowerPoint Slides which you can then save as an image file for use on your hubs and online posts. After that, I'll show you how you can create images that combines text and clipart into one object. This entire tutorial will take us through the following steps:
Changing Slide Layout To Blank
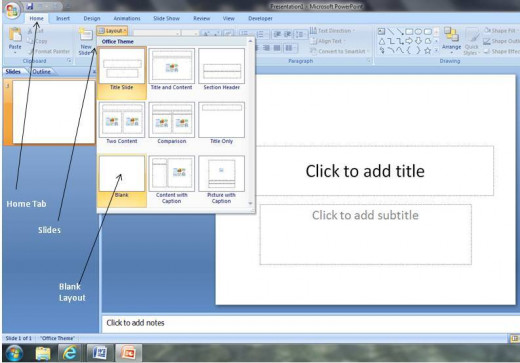
Open your PowerPoint Application program. A new window opens with the default "Title Layout". You need to change this to a "Blank layout". How?
- On the 'Home Tab' go to "Slides Group". Click on Layout button, then click 'Blank". You now have a blank layout slide. See Image 1.
Image 1
Creating Text Image Using Word Art
Now, to create a text image, you have the option to use the 'textbox' on the 'Home Tab' drawing menu group, or the one on the 'Insert tab' text menu group to type in your text. You will then have to do your formatting. You can also use the Word Art tool on the Insert tab, Text menu group to accomplish this task.
For this tutorial, I'm going to use the "Word Art" on the 'Insert tab' text menu group. How?
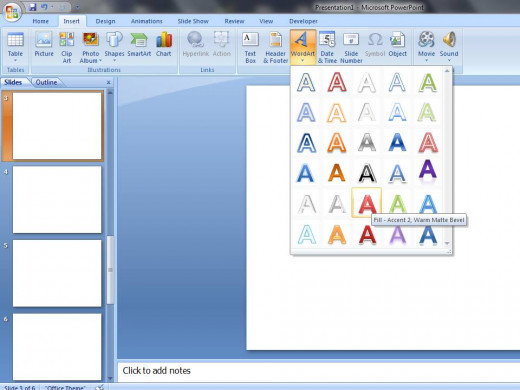
- Click on the 'Insert Tab' and click 'WordArt' in the Text menu group. This is a preferred method as the word art texts are pre-formatted and just needs to be manipulated for size, color, height, and background fill. Click on your preferred style. I'm choosing the "Fill - Accent 2 - Warm Matte Bevel" (See Image 2).
Image 2
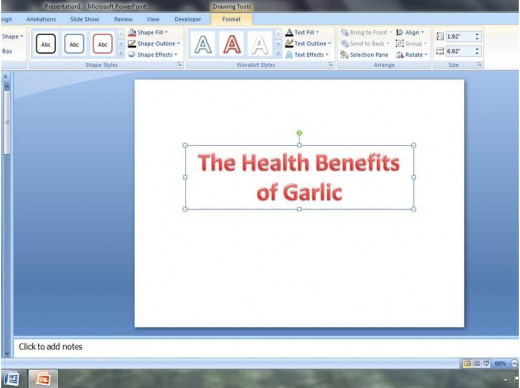
Now it's time to type the text while the "Your Text Here" in the box is still selected. You can type in the following text/phrase options:
- The Health Benefits of Garlic
- Manual Backlinking Tips, or
- Five Great Places To See, and the list can go on...
Go on and type. I'm using the first of the examples. You should type whatever text that's related to your hub topic.
Image 3

Changing The Word Art Background Fill
Now that you've typed your text/phrase, notice the 'Drawing Tools' plus 'Format' tabs on your menu ribbon. This is all you'll need to format your Word-Art text. Here, you can use the Shape/Text Fill, Shape/Text Outline, and the Shape/Text Effects options to manipulate the background fill, text-box outline color, weight etc. To change the size of the text, just select all and use you font size option on the home tab.
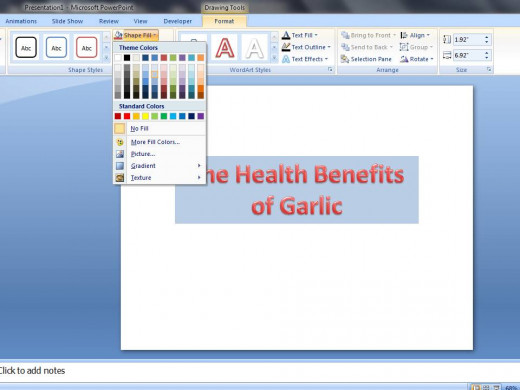
So, I'm thinking we need to change the Word-Art background fill to a light blue. How? First, double click on the Word-Art text frame to get a solid frame. Now click on Format tab, right below the Drawing Tools, then click on Shape Fill in the Shape Styles menu group (See Image 5 below). From the list of color, select a light blue color fill. Voila! Now, it's time to save as an image (with a jpg, jpeg, PNG or GIF extension, your choice).
But, before we save this image, I'm going to show you how you can add a clip art image into your WordArt to make it more appealing/inviting to your hub audience.
Image 5
Adding Clip Art To Your Word Art Text
Right below the Insert tab, click on Clip Art (the Clip Art window pane emerges). Search for images that relates to the topic of your hub. In my case, that will be garlic.
From the list of generated clip art images, select one that has a .jpg extension ( you can tell by pointing to, not clicking on, the images and reading the properties). Once you've found the one you like, click on it to insert it unto your slide (same slide with the Word Art). Re-size the image and position right below your Word Art (centered). (See Image 6)
Now, click after the last letter of your Word Art text (letter "c", in my case). Hit the 'Enter' key several times until the Word Art background color fills around and below the clip art image as shown (Image 7). Now, its really time to save this work of art!


Saving The WordArt & Clipart As One Image
To save the Word Art and Clip-art as one image they will have to be grouped. This is so they can be treated as a single object. To do this, hold down the ctrl key on your keyboard and hit the letter 'A' key simultaneously. This will select both the Word Art and clip-art images on your slide. Notice the Picture Tools next to your Drawing Tools on your ribbon?
With the images still selected, click on the Format tab below the Picture Tools. Then click on the Group option in the Arrange menu group (See image 8). The images have now been grouped together as one object.
On the Office Button (round yellowish thing) click the 'Save As' menu option. In the 'Save As Type' of the Save As Dialog Box, select 'JPEG File Interchange Format'. Type a desired name for you image into the 'File name' drop-down box, then save. A dialog box should pop-up asking if you want to export all the slides or just the current slide, click the 'Current slide only' button option. You image is then saved in your picture default folder.
You can then re-open your image file with any picture editing tools, such as, Microsoft Office Picture Manager to crop away any unwanted edge from all four sides.
In addition to Clip Art Images, you can import your own pictures or scanned drawings to combine with your Word Art. You can then group them as one object, and save them for use. I hope you find this tutorial useful in making your very own combined Word Art and/or Clip art JPEG (GIF or PNG) images.


For A More In-Depth Understanding, Watch The Video!
Did You Find This Tutorial Easy To Follow?
Sites That Offer Free Images
There are a few websites out there that do offer free images online. This may be an option for you. However, you need to do your homework in finding out the various copyright laws govenining the use of the images from these sites.
Here are a few of those sites:
- freedigitalphotos dot net
- Shutterstock dot com
- Dreamstime dot com
- GettyImages dot com
- ClipartCastle dot com
- FreeFoto dot com
- photobucket dot com
As I mentioned earlier, you need to proceed with caution. Be sure you're aware of all the rules surrounding the use of the images you get. You can also get free images from Microsoft.com.
♦♦♦♦♦♦♦♦♦♦♦♦♦♦♦♦♦♦♦♦♦♦♦♦♦♦♦♦♦♦♦♦♦♦♦♦♦♦♦♦♦♦♦♦♦♦♦♦♦♦♦♦♦♦♦♦♦♦♦♦♦♦♦♦♦♦♦♦♦♦♦♦♦
Do you love to write? Do you have a passion for sharing with others what you know? You can do that by signing up right here on hubpages. And guess what? You'll make some money doing it too. Writing, that is.
Author: Comfort Babatola - ©2013


